The Employer Details page contains all the specific information for an employer.
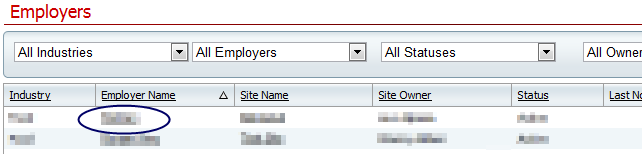
The employer detail page can be opened from the Employer List Page in the My Office Tab. To open an existing employer, click on the employer name on the Employer List page. To create a new Employer Details page, click on the New tool in the tool bar on the Employer List page.
--- OR ---
![]()
Create a new employer
View and Edit details of an existing employer
After opening a new Employer Details page from clicking the New Tool in the Employer List page, proceed with the following steps:
Throughout the process, click the Save tool in the tool bar to save changes made on the Employer Details page.
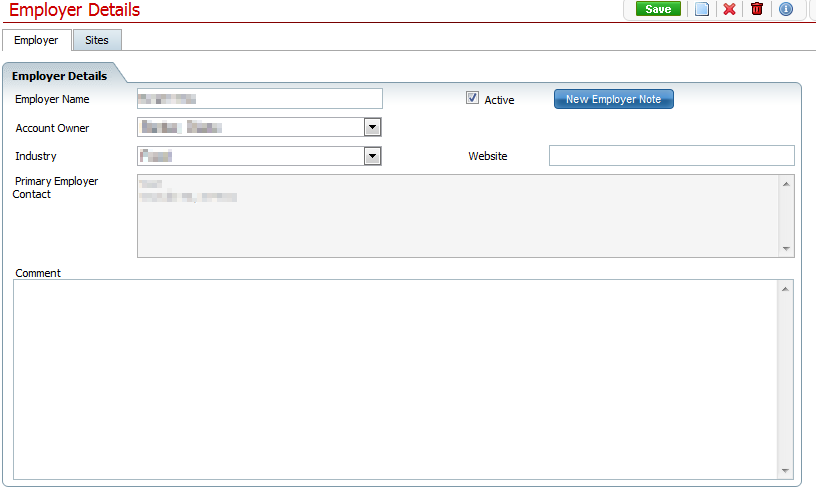
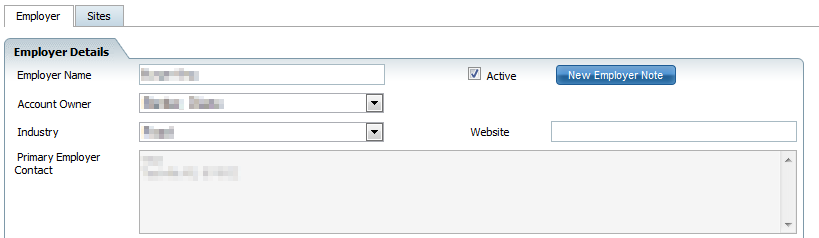
Complete the sections of the Employer Tab
Employer Name - Enter the name of the employer into the text box
Active Check Box - Check this box to indicate this employer is currently active
Account Owner - Select the staff name using the drop down box. The name will default to the author of the new Employer Details page. The author can modify to another staff name as applicable.
Industry - Select the Industry of the employer using the drop down box provided
Website - Enter the employer website information into the text box
Primary Employer Contact - This will list the individual and contact information for the employer primary contact. The information will auto populate based on information entered in the Contacts tab.
Comment - Enter any applicable comments into the text box.
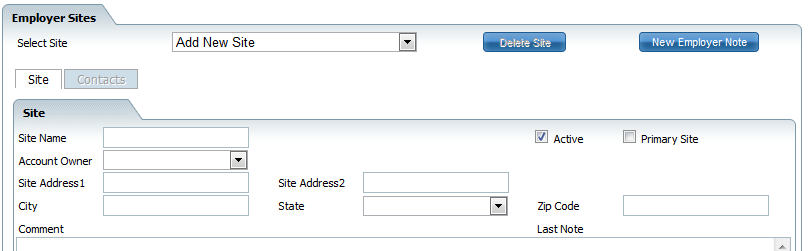
Complete the sections in the Sites Tab
Select Site - Use the drop down to select an existing site or to select "Add New Site." This will allow new information to be entered in the fields below.
Note: Use the Delete Site button to delete site information on this page
Site Name - Enter the name of the site using the text box.
Active Status - Use the check box to indicate if the site is currently active.
Primary Status - Use the check box to indicate this site as the primary site. This can only be selected for one site at a time.
Site Owner - This is the person responsible for the site. Select the name of the site owner from the drop down list. This field will default to the name of the author of the Employer Details page. The user can modify the name in this box as applicable.
Site Address and Site Address 2 - Use the text boxes to indicate address information.
City - Enter the city of the site location.
State - Enter the state of the site location.
Zip Code - Enter the zip code of the site location.
Comments - Enter any applicable comments using the text box.
Last Note - This field indicates the last Employer Note created for this employer. Click on the underlined Date/Time to open the last Employer Note.
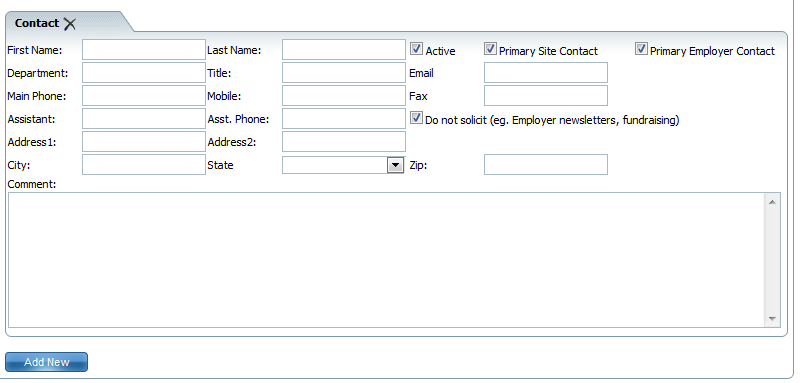
For each new contact, complete the sections in the Contacts Tab. This tab is accessed through the Sites Tab. Use the check box at the top of the page to only view active contacts on the page. Use the expand view to view more than the first three lines of the contact's information. Use the "X" next to the contact to delete the contact from the list.
Select Site - Use the drop down at the top of the page to select the site the contacts are associated with.
First Name and Last Name - Enter the contact's name
Active Status - Use the check box to indicate the contact is currently active.
Primary Site Contact Status - Use the check box to indicate this contact as the primary site contact. Only one contact can have this check box checked at any given time.
Primary Employer Contact Status - Use the check box to indicate this contact as the primary employer contact. This primary employer contact's information will appear in the Employer tab of the Employer Details. Only one contact can have this check box checked at any given time.
Department - Enter the department name of the contact
Title - Enter the job title of the contact
Email - Enter the contact's email address
Main Phone - Enter the main contact phone number for the contact
Mobile - Enter the contact's mobile phone number
Fax - Enter the contact's fax number
Assistant - Enter the name of the contact's assistant
Assistant Phone - Enter the phone number of the contact's assistant
Do Not Solicit Status - Check this box to indicate the contact does not want to be solicited regarding Employer Newsletters, fundraising, etc.
Address 1 and Address 2 - Enter the contact address information into the text boxes.
City - Enter the city of the contact address.
State - Enter the state of the contact address.
Zip Code - Enter the zip code of the contact address.
Comment - Enter applicable comments into the text box.
After clicking on the Employer name located on the Employer List Page, the Employer Details Page will open with the employer's information. View the information by using the tabs to move to the field you wish to view. Modify information by editing fields as indicated in the above section on Creating an Employer Details Page. Make sure to click the Save button located in the tool bar on the top right of the screen to save any changes made.
![]()
SmartCareEHR User Help
Version 2.1
Copyright © 2012 Streamline Healthcare Solutions